

Concrete Honeycombing Repair: Assessment, Grouting and Reinstatement
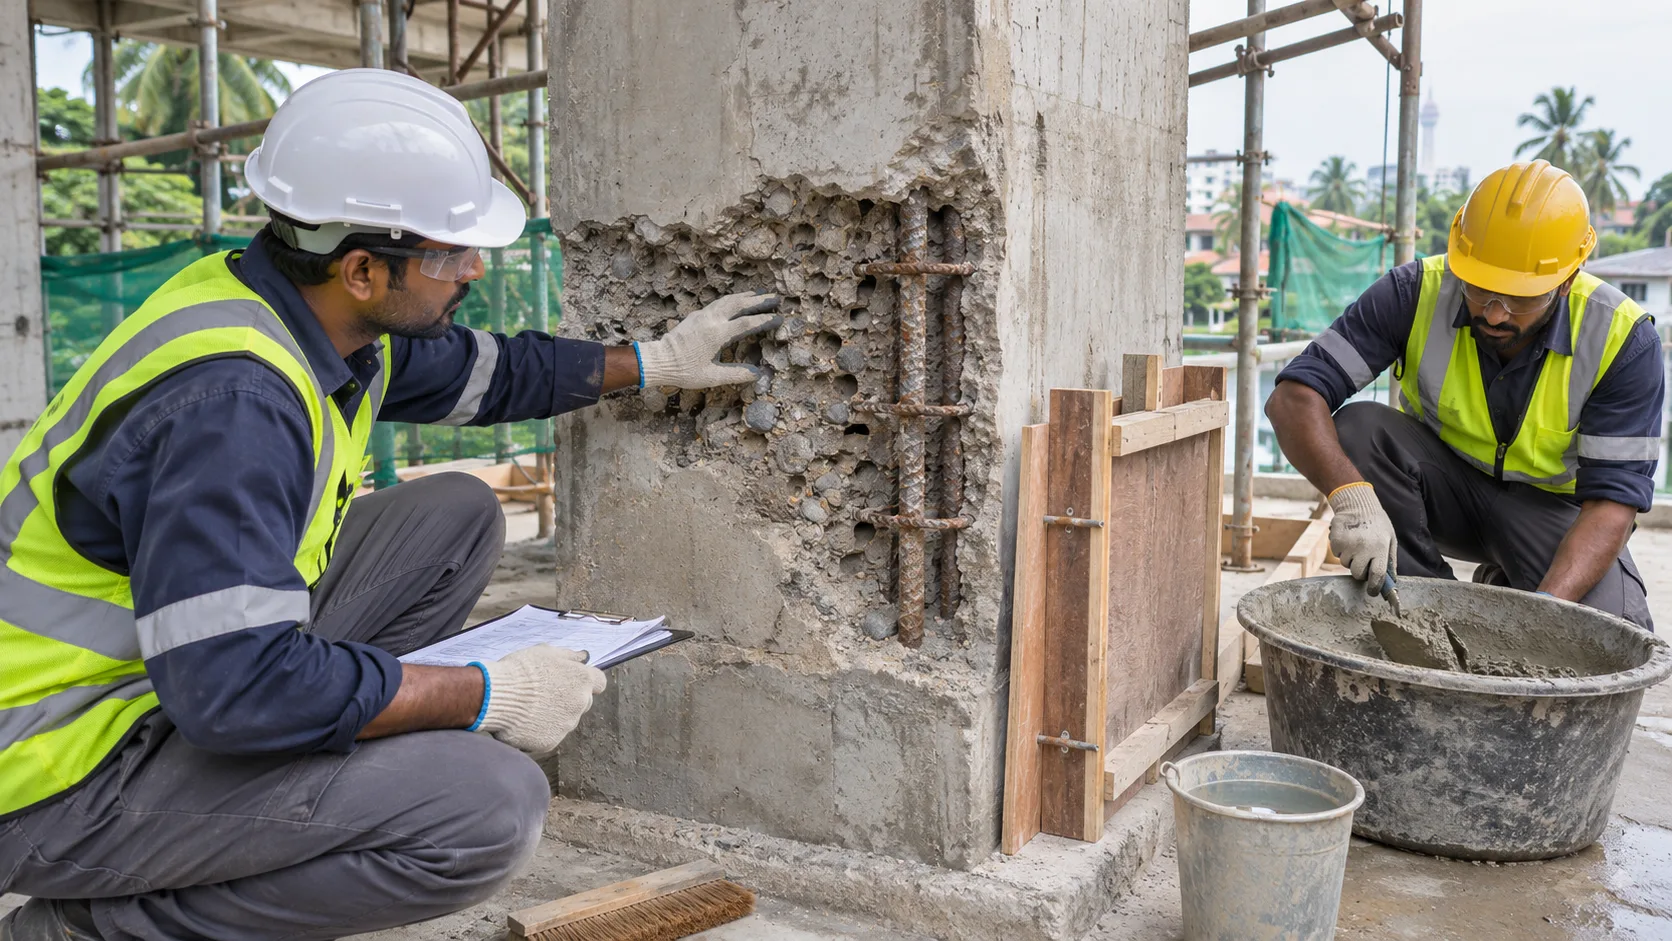
Honeycombing appears as voids, exposed coarse aggregate or poorly filled areas after formwork is removed. Some defects are shallow and cosmetic; others extend behind reinforcement and reduce cover, bond or effective section. Good concrete honeycombing repair starts by determining which condition exists.
Covering the surface immediately with plaster hides the evidence and can trap weak concrete beneath a thin finish. The defect should be recorded, sounded and assessed before edges are obscured or the element is loaded further.
What causes honeycombing in concrete?
- Insufficient vibration or poor access for compaction
- Congested reinforcement that blocks aggregate movement
- Concrete with unsuitable workability or aggregate grading
- Leakage of cement paste through gaps in formwork
- Excessive drop height, segregation or interrupted placement
- Obstructions around inserts, waterstops and construction joints
Assess depth, area and structural significance
Map the visible defect and use hammer sounding or other suitable methods to identify loose or hollow zones. The engineer may require local breakout, cover measurement, strength testing or non-destructive investigation. Check whether voids pass behind bars or through the full member thickness.
Location matters. A small shallow defect on a broad wall differs from deep honeycombing at a beam-column joint, bearing zone or heavily reinforced column. The assessment should consider loads, durability exposure, fire cover, water tightness and the role of the affected element.
Remove unsound material to a repairable shape
Break out weak and poorly bonded material without damaging sound concrete or reinforcement. Avoid feather edges that leave repair material too thin. The final cavity should provide access for cleaning, placement and compaction while following the engineer's limits on removal from a loaded member.
- Survey and mark the confirmed repair boundary.
- Provide temporary support if the engineer requires it.
- Remove loose and defective concrete using controlled tools.
- Clean the cavity and inspect concrete behind reinforcement.
- Remove corrosion and treat or replace steel as specified.
- Precondition or prime the substrate for the chosen repair material.
- Place, compact and finish the repair without trapping new voids.
- Cure the repair and complete the required inspection or testing.
Choose the repair material by geometry
Hand-applied polymer-modified mortar suits many accessible, relatively shallow repairs. Flowable micro-concrete can reinstate larger or deeper sections within well-sealed formwork. Cementitious or epoxy grouts may fill defined internal voids where breakout is limited, but injection should not be used to conceal unknown loose concrete.
Treat reinforcement and restore cover
If reinforcement is exposed, inspect it for contamination, poor bond, displacement and corrosion. Clean and treat it to the approved repair specification. Where section loss is significant, the structural engineer decides whether bars need supplementation or replacement. The completed repair must restore the specified cover and geometry.
When injection grouting is appropriate
Injection can fill connected voids that have a known extent and sufficient surrounding concrete. Ports, vents, material viscosity and pressure should be designed so air escapes and grout reaches the target without splitting the member. Trial injection or verification cores may be needed on critical repairs.
Avoid these common repair mistakes
- Plastering over loose aggregate without assessing depth
- Using a dry patch that cannot compact behind reinforcement
- Leaving dust or standing water on the bond surface
- Ignoring corroded or displaced reinforcement
- Removing too much concrete from a loaded element without support
- Failing to cure cement-based repair materials
A repair should be compatible in strength, stiffness, shrinkage, thermal behaviour and permeability. The hardest material is not automatically the best; a very rigid patch can transfer stress or debond from weaker surrounding concrete.
Quality checks after reinstatement
Inspect the finished surface, dimensions, cover and curing records. Sounding, pull-off testing, cores or other checks may be specified depending on the repair. For water-retaining or below-ground concrete, confirm that the repaired zone and adjoining joints meet the required water-tightness detail.
Concrete honeycombing FAQs
- Is all honeycombed concrete structurally unsafe?
- No. Severity varies widely, but visible appearance alone cannot establish depth or structural effect. Important or deep defects should be assessed by the project engineer.
- Can epoxy fill honeycombed concrete?
- Low-viscosity epoxy may fill suitable dry, stable voids under a designed procedure, but it does not remove loose concrete or correct every structural and durability concern.
- Can honeycombing cause water leaks?
- Yes. Connected voids can create water paths through walls, tanks, basements and joints. Repair should address both concrete integrity and the waterproofing requirement.
Concrete defect repair by H.E. Engineering
H.E. Engineering repairs honeycombed, spalled and defective concrete using compatible mortar, micro-concrete and injection systems. Our teams work to an approved method covering assessment, breakout, reinforcement treatment, reinstatement, curing and protection.